
Video files can be massive, so it can take a long time to upload them and share them to social media platforms as well as put a lot of stress on your bandwidth.
You can also save space in systems like Google Drive, the Cloud or Vimeo by compressing your video files, especially when you’re working with limited storage capacity.
In this post we’re going to look at how to use a program called Handbrake to compress your video files without losing quality.
Handbrake should only be used for finished video exports on your computer when you’re preparing for upload. Video files recorded and edited on your phone are already quite compressed and suitable for sharing on social media platforms.
For this tutorial, I’m focussing on using Handbrake on Mac, but the processes are almost identical for windows. So let’s go step by step through the standard settings I use to compress all of my videos.
How to Use Handbrake
- You can download and install Handbrake for free from Handbrake.fr
- Once it’s been downloaded and installed, open Handbrake from the Applications or Programs folder on your computer
- A file browser window should automatically open when you launch the program for you to select your source video file
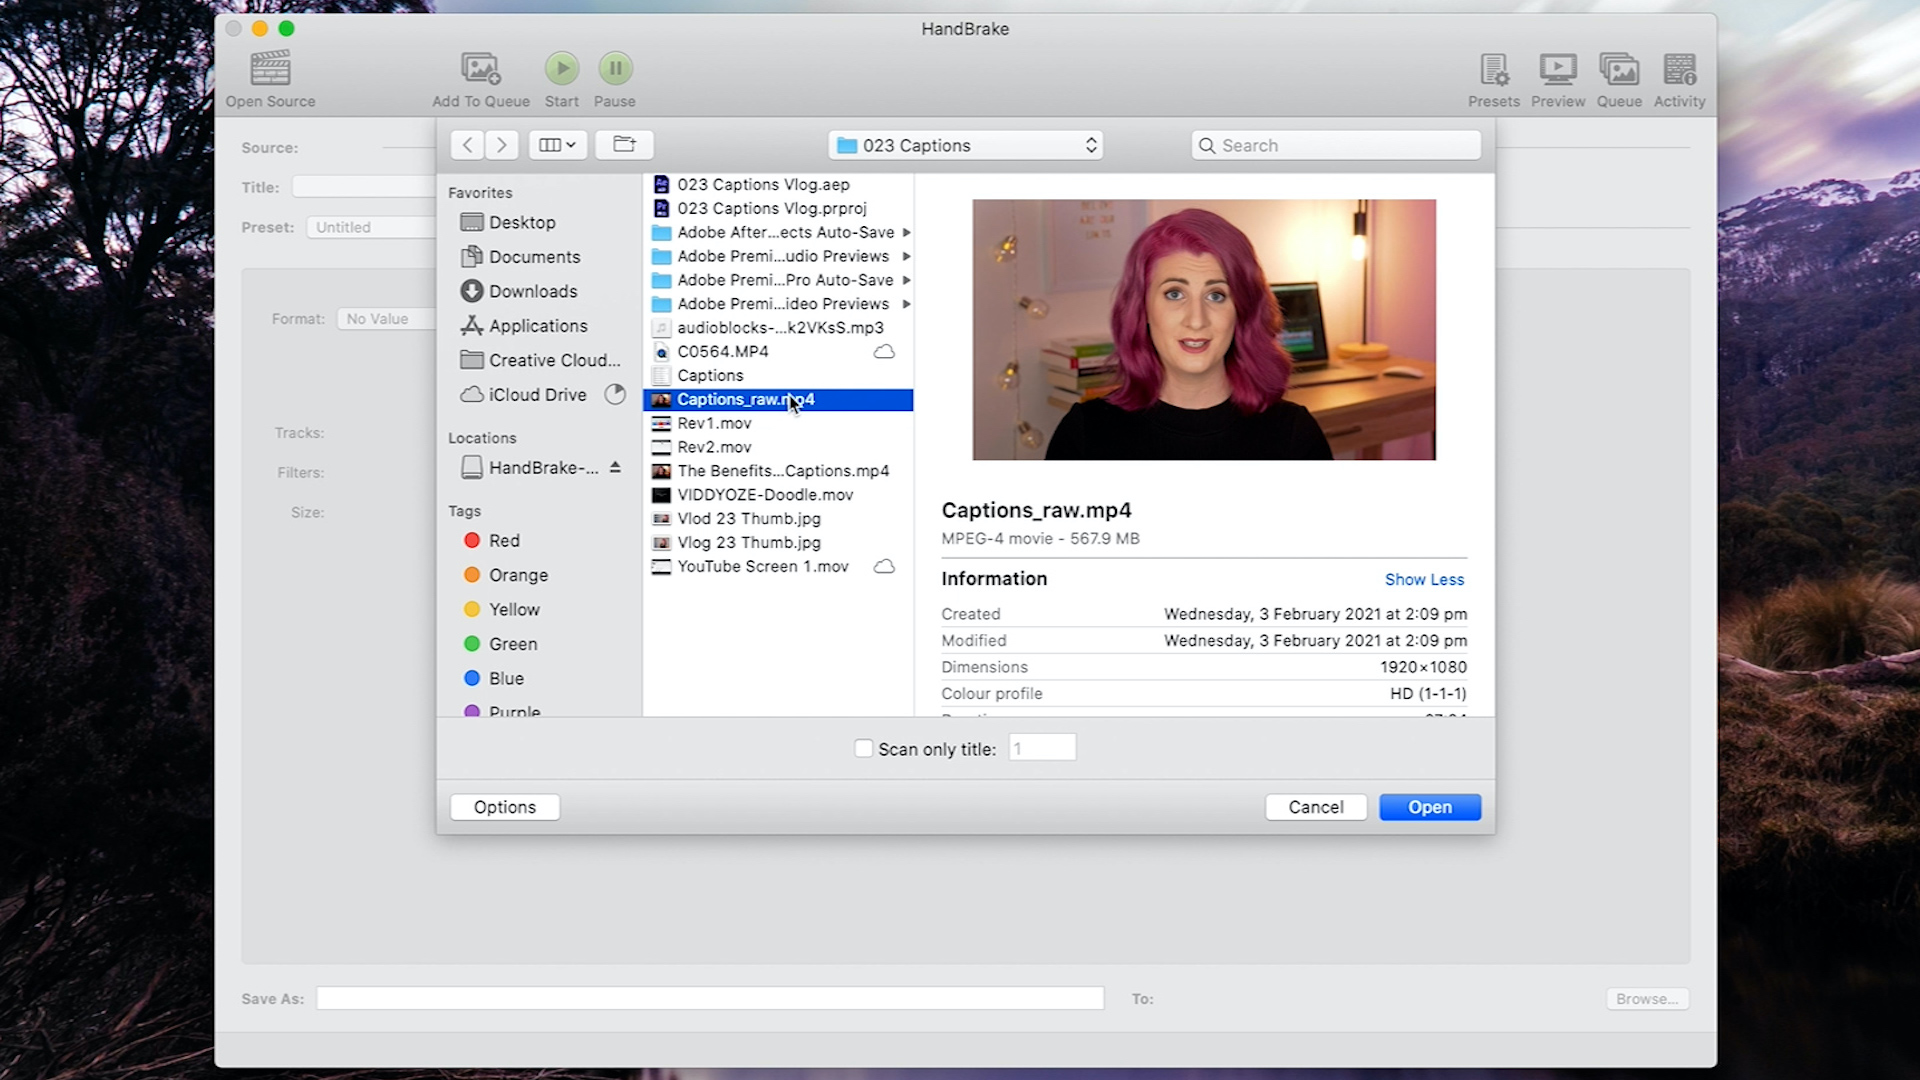
- If not, click the Open Source button and select the video file you want to compress
- First, rename your video file in the Save As section. A process I have in my workflow is to name all of my initial, uncompressed video exports with ‘_raw’ on the end, and remove the ‘_raw’ for the final compressed version so I don’t overwrite the original
- Choose where you want to save your video by clicking Browse and selecting a destination
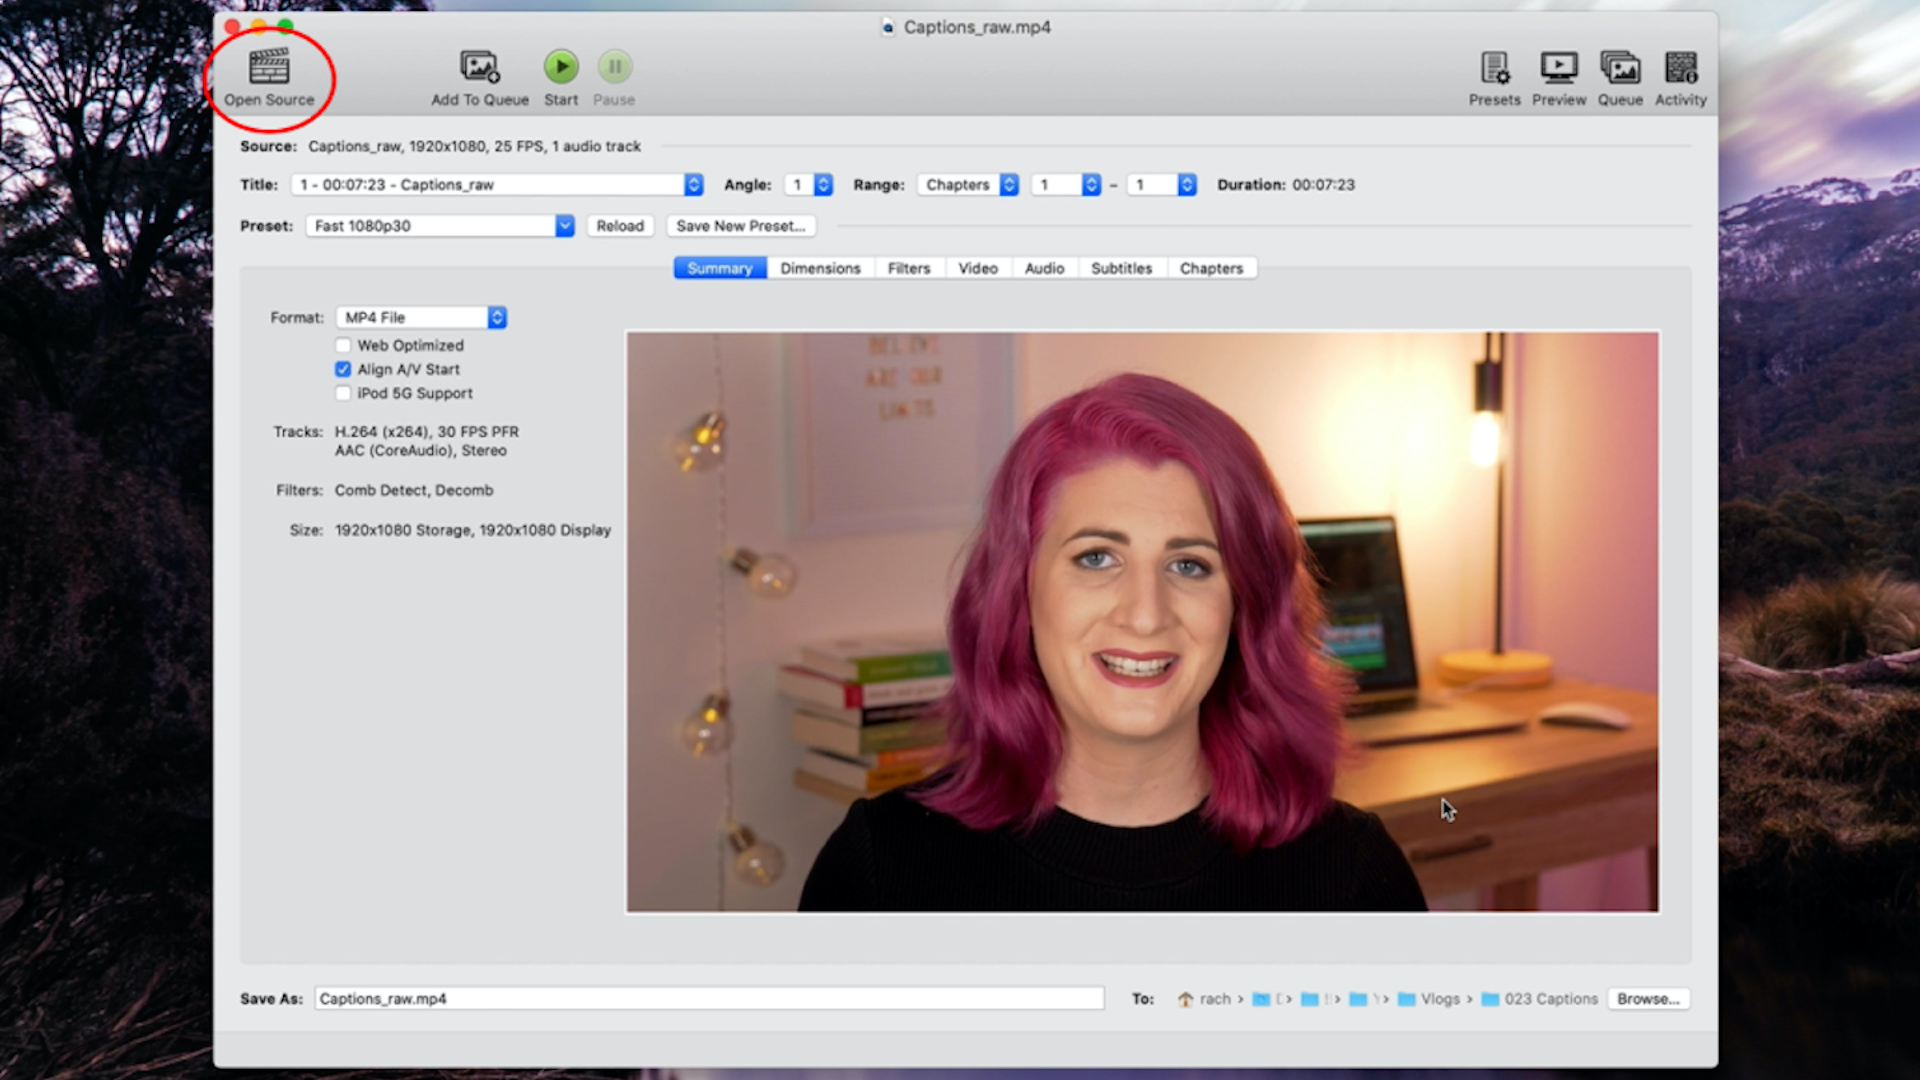
- Make sure the format is an MP4 file, which is the most accessible file type for most platforms, and also select Web Optimised

- Jump over to Dimensions and make sure they match your source file so your video won’t be cropped

- Click over to the Video tab. Make sure H.264 is selected in the Video Encoder, and the Framerate is Same as source so it always matches the framerate of your original source file

- Select the Audio tab and assign the Bitrate to the highest setting

- Now you’re ready to hit Start

- Handbrake will alert you with a dialogue box when your video is ready, and you can easily navigate to where your video is saved by hitting Show
- Compare the size of your original file and the compressed file to see the difference
- Watch it back to make sure there are no problems and you’re ready for upload
- If you’re happy with the settings you can save a preset by clicking Presets > + and adding a title and description
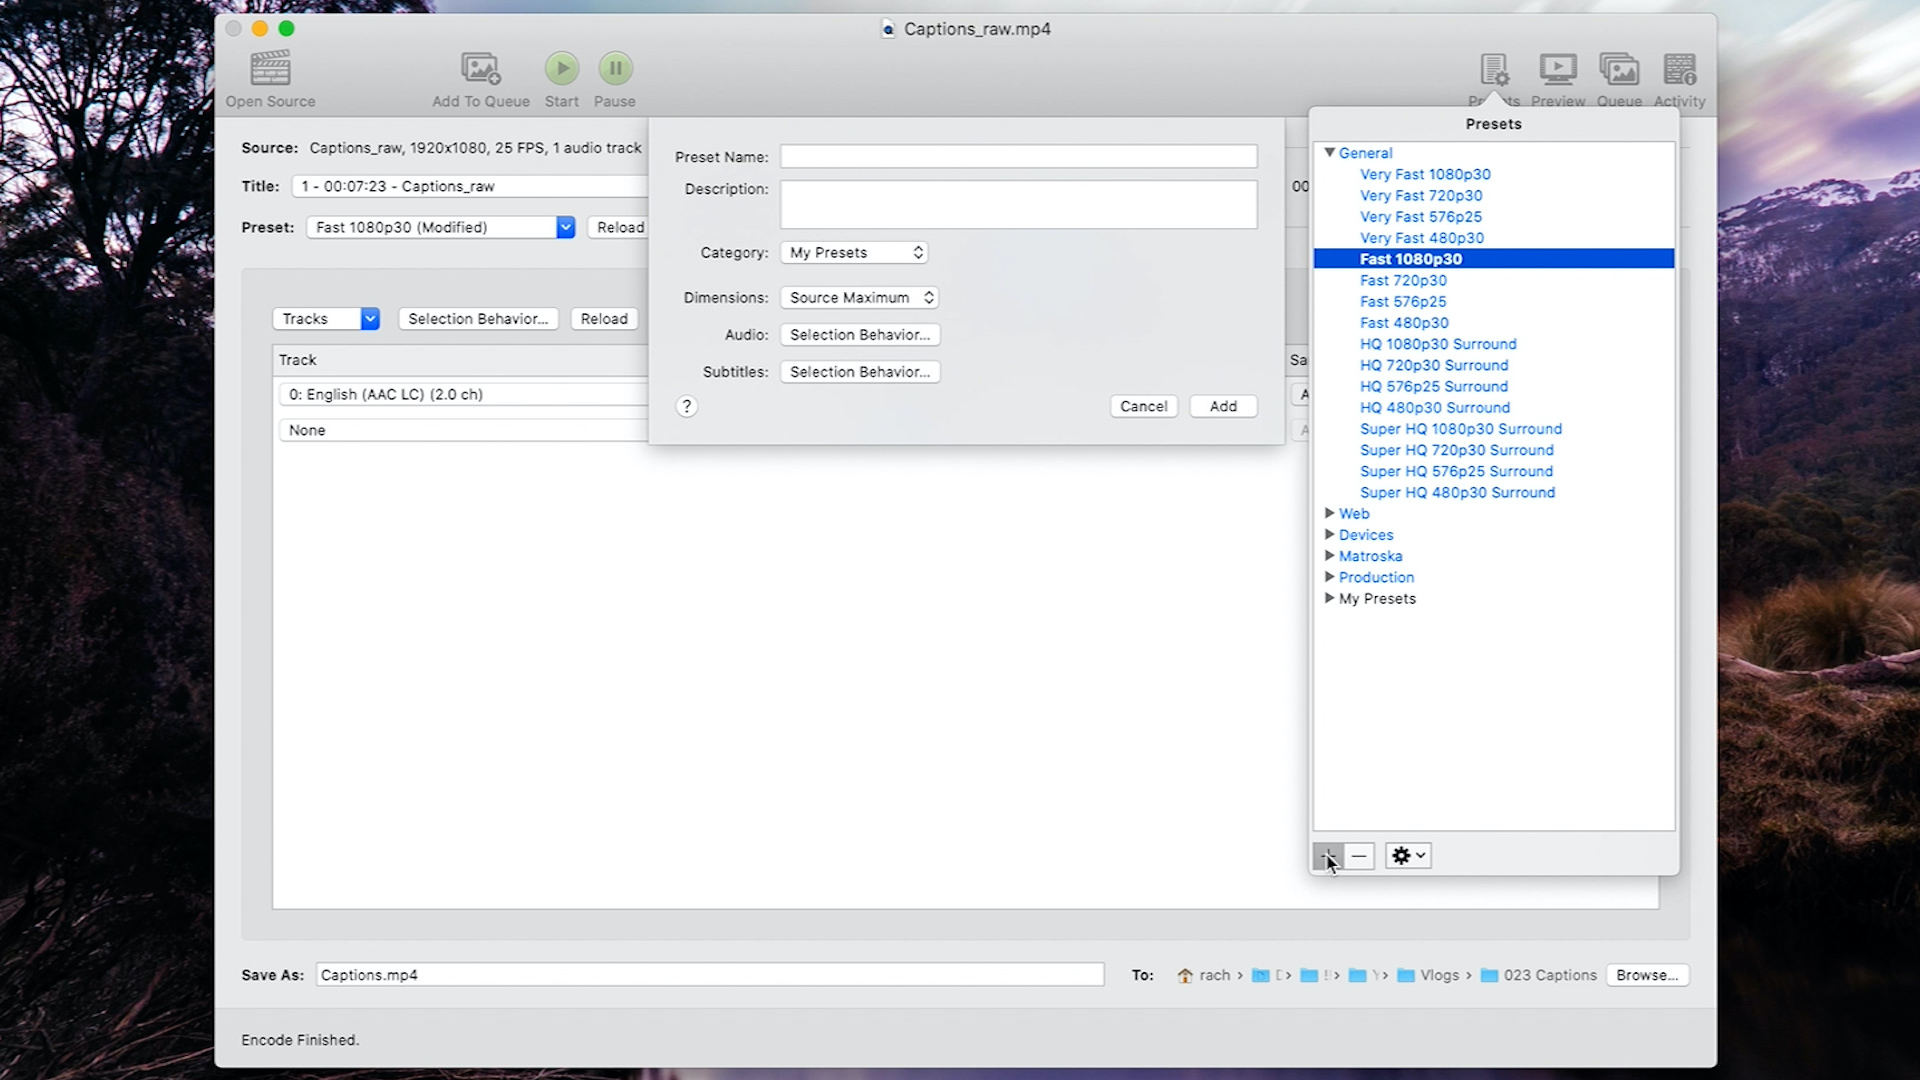
- You can also queue multiple videos for compression while another video is already being processed by opening a new source, checking the settings are correct and hitting Add to Queue. You can open the Queue window to watch the status of all your videos

I hope you found this tutorial helpful, and leave a comment with your questions below so I can answer them for you.
Did you know that 85% of videos on Facebook are viewed without sound? Check out this article about the benefits of using captions in your videos.
For more video tips and techniques subscribe on YouTube.